This step-by-step guide is here to help make your Civic experience faster and easier! Your experience may be slightly different than this guide, depending on the device you’re using. If you need additional help, contact us at 844-772-4842.
1. View accounts dashboard
Once you log in, you will see your accounts dashboard. This screen displays all your Civic accounts and cards, and any external or aggregated accounts you may have set up.
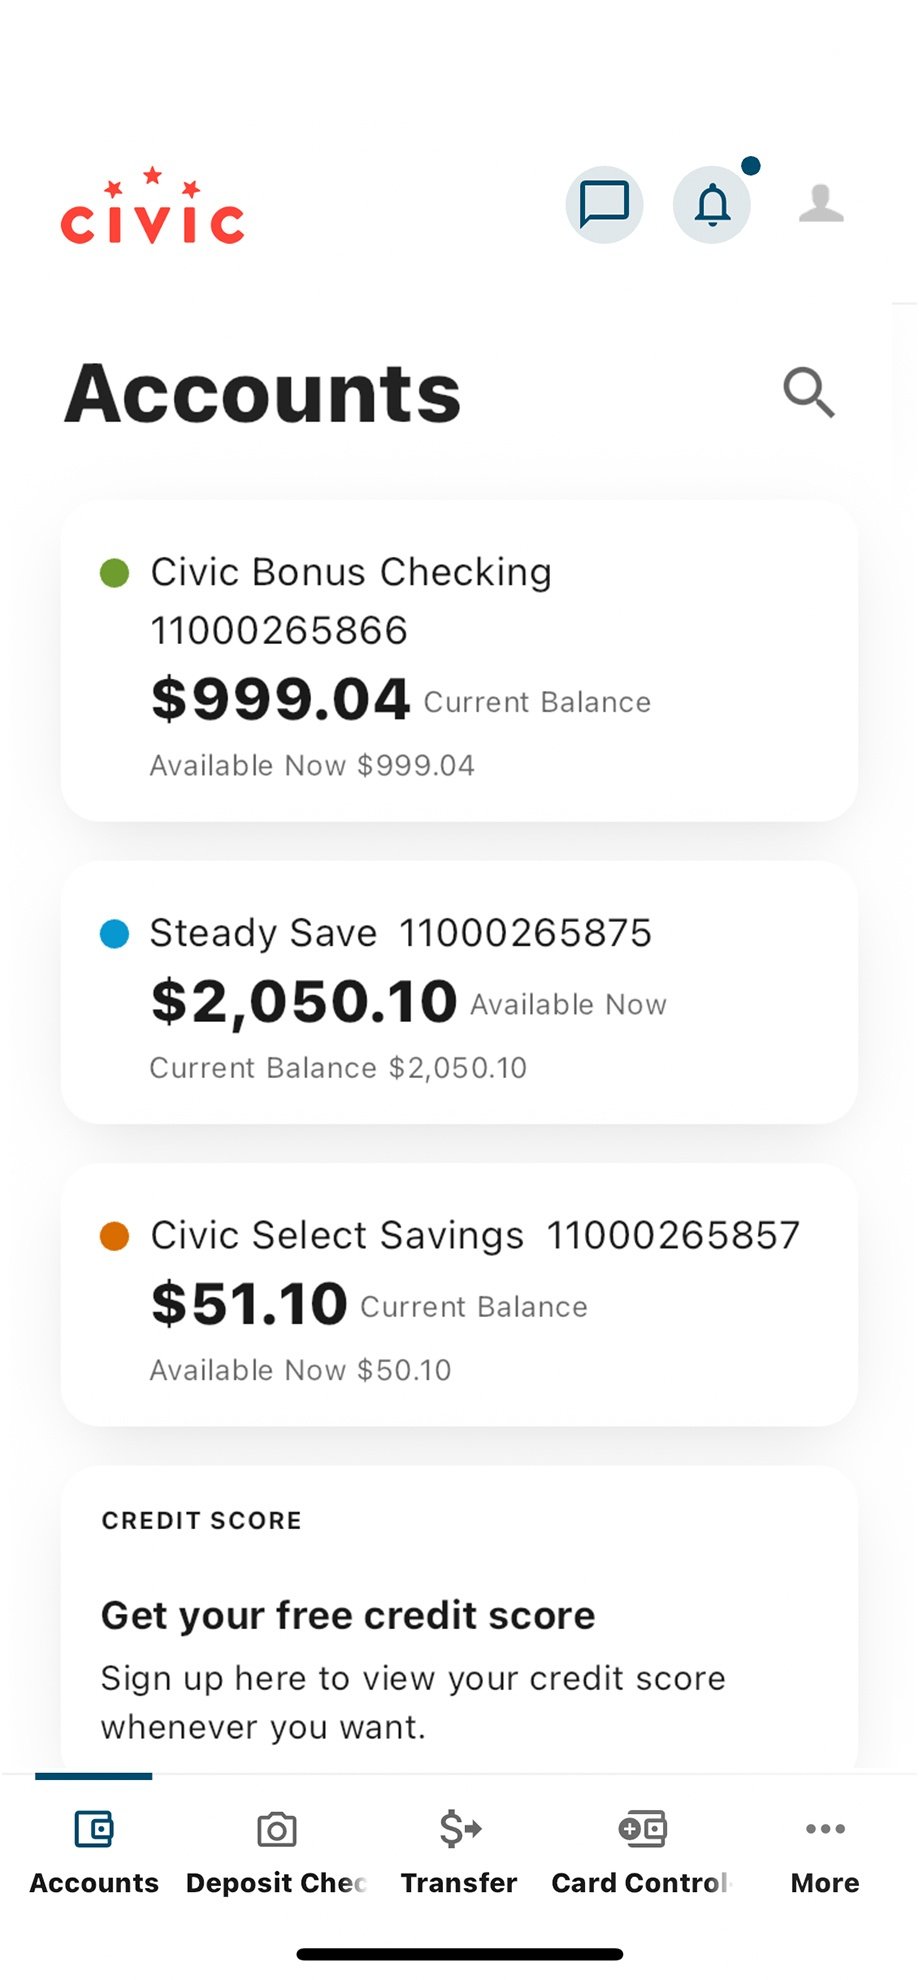
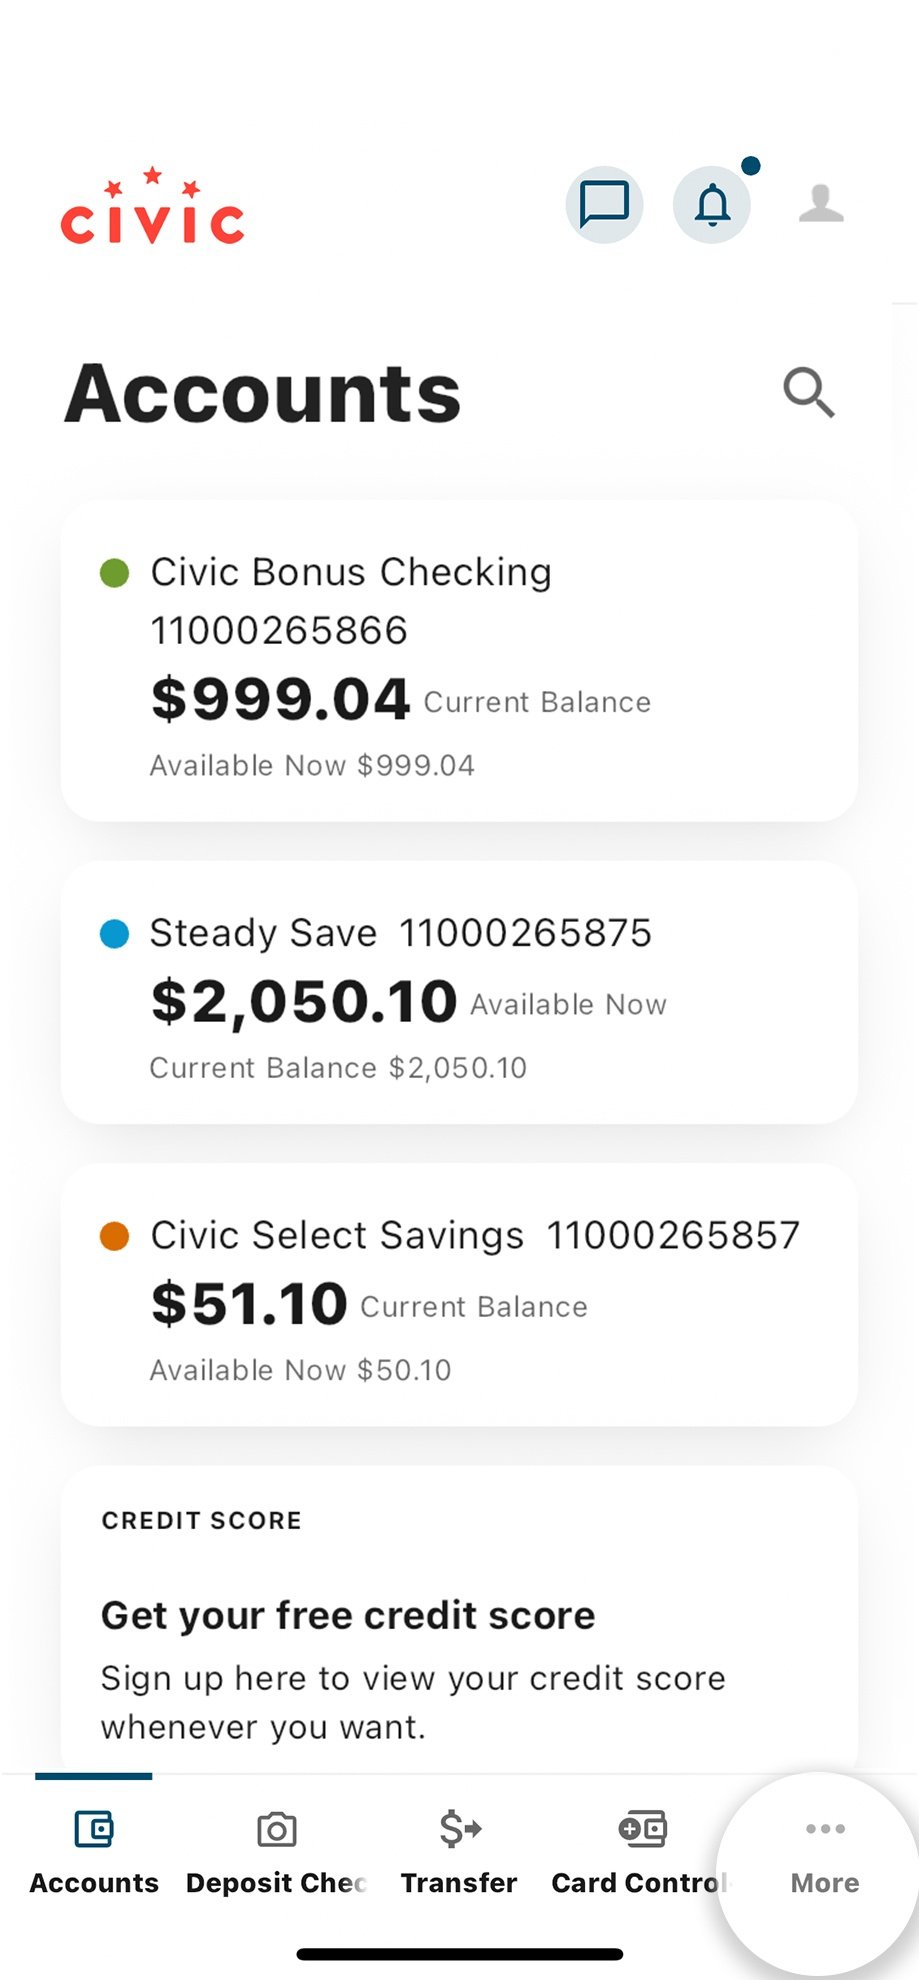
2. Tap More
In the menu at the bottom of your screen, tap More.
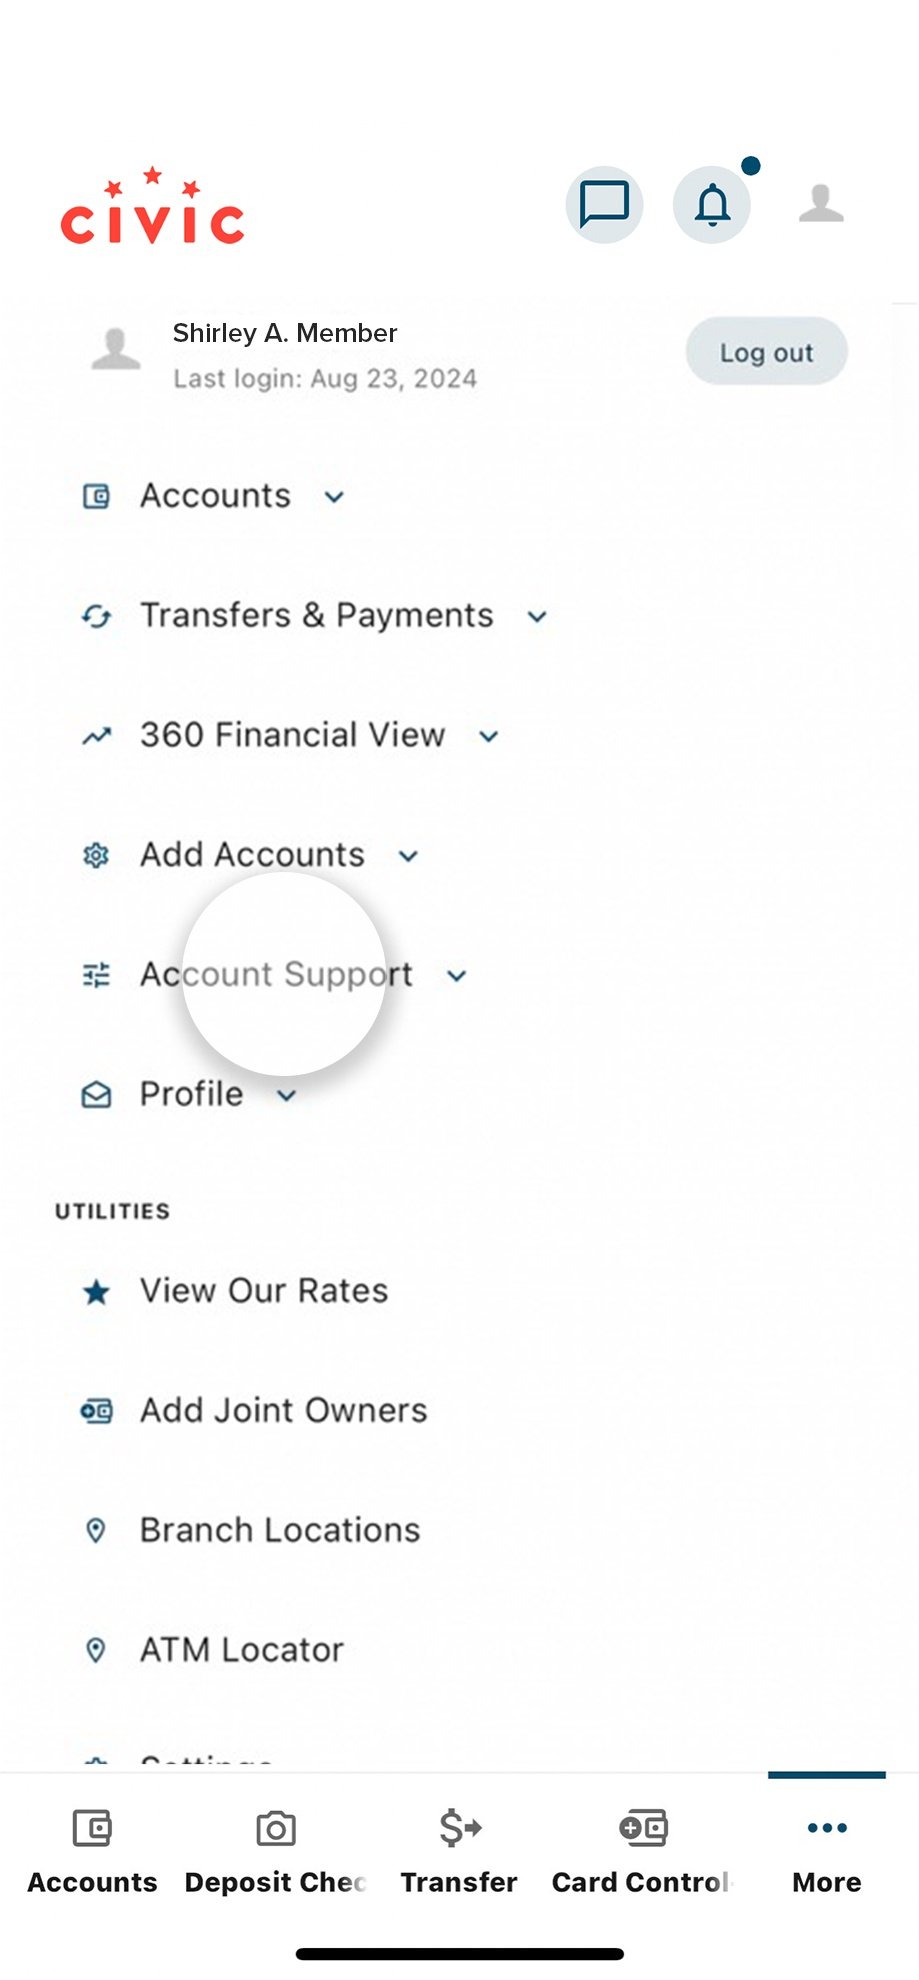
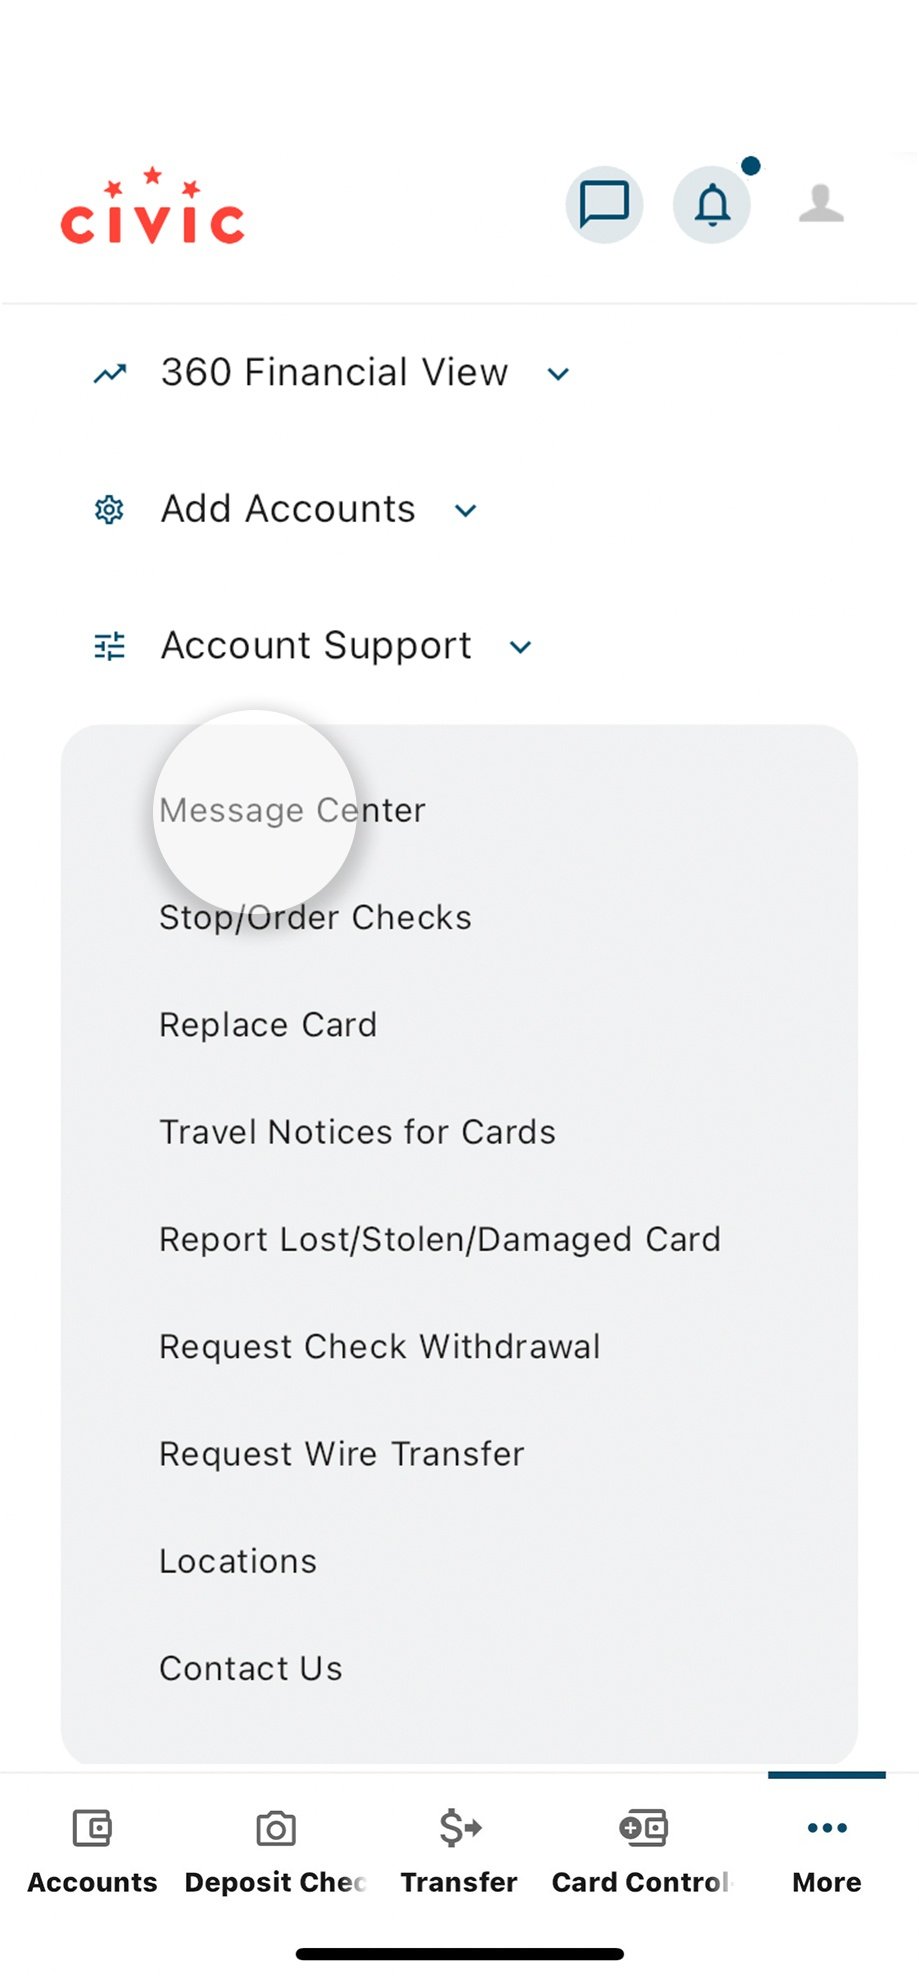
3. Tap Account Support
In the menu options listed, select Account Support.
4. Tap Message Center
In the drop-down menu, tap Message Center.
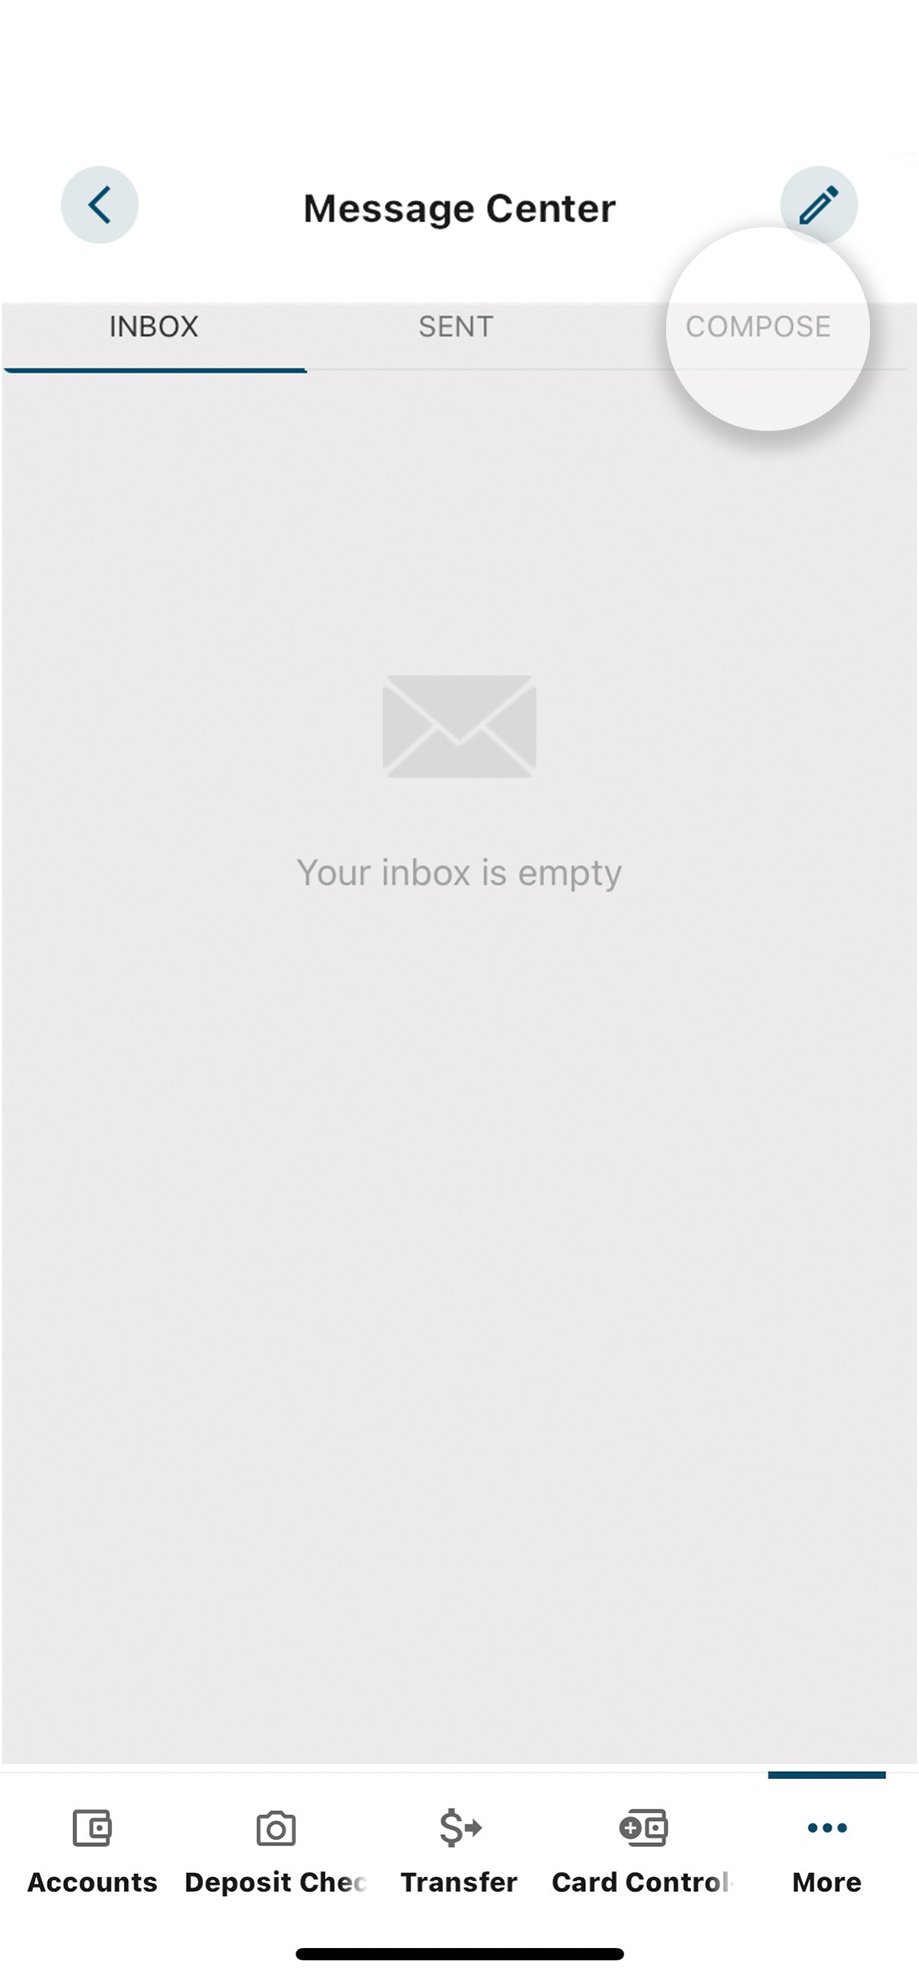
5. Select Compose
Tap the Compose button at the top to start a new message.
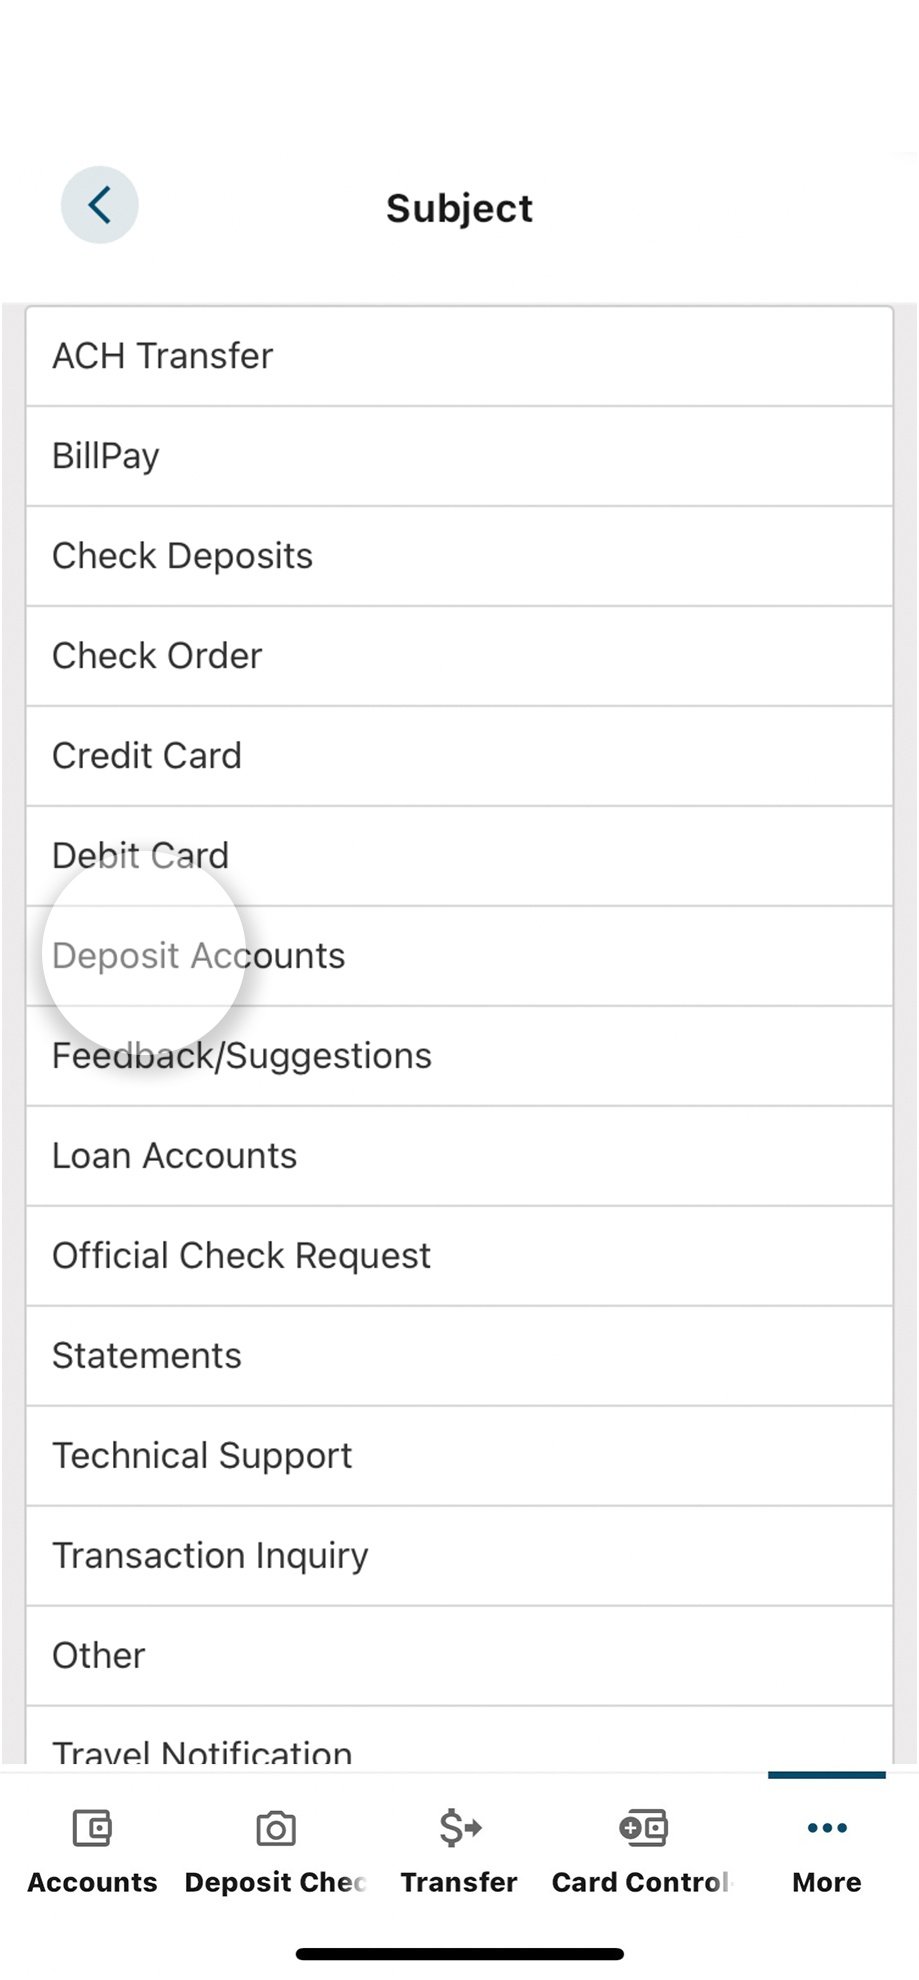
6. Select Subject
Tap Subject and a scrolling menu will appear. Select Deposit Accounts from the subject list.
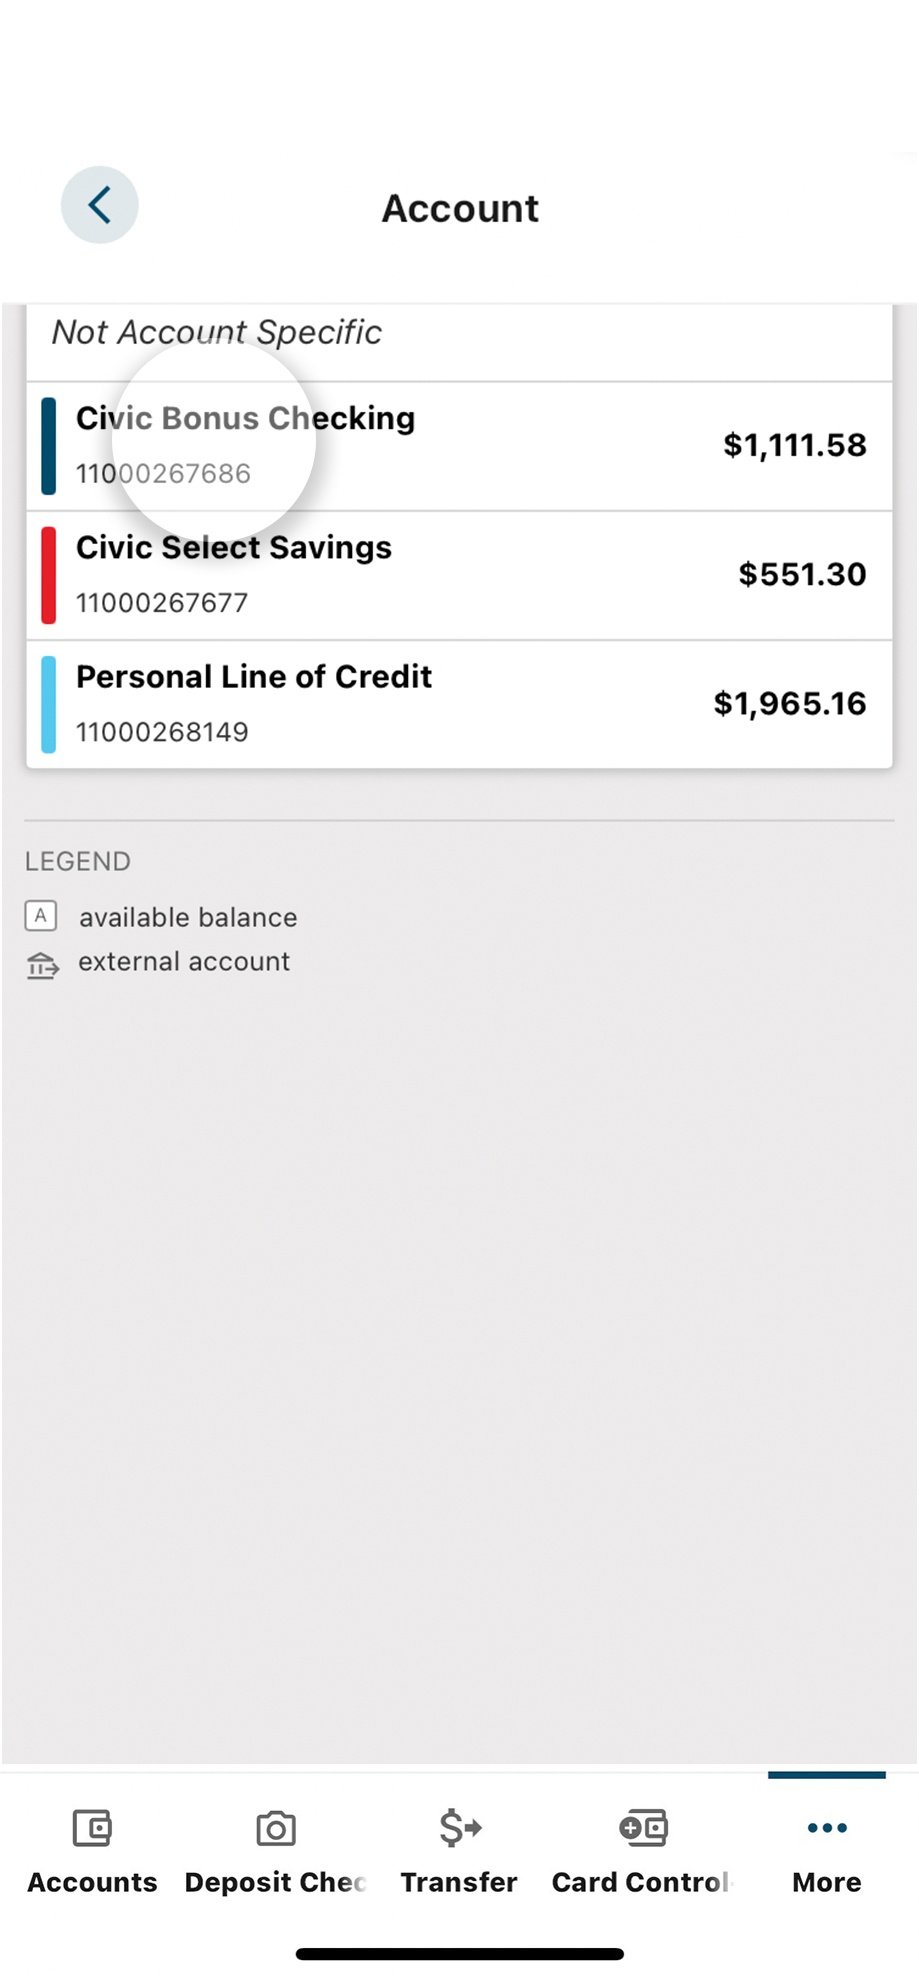
7. Select Account
Select Account and a list of your deposit accounts will appear. Choose the account you want to add an authorized signer to, or choose Not Account Specific.
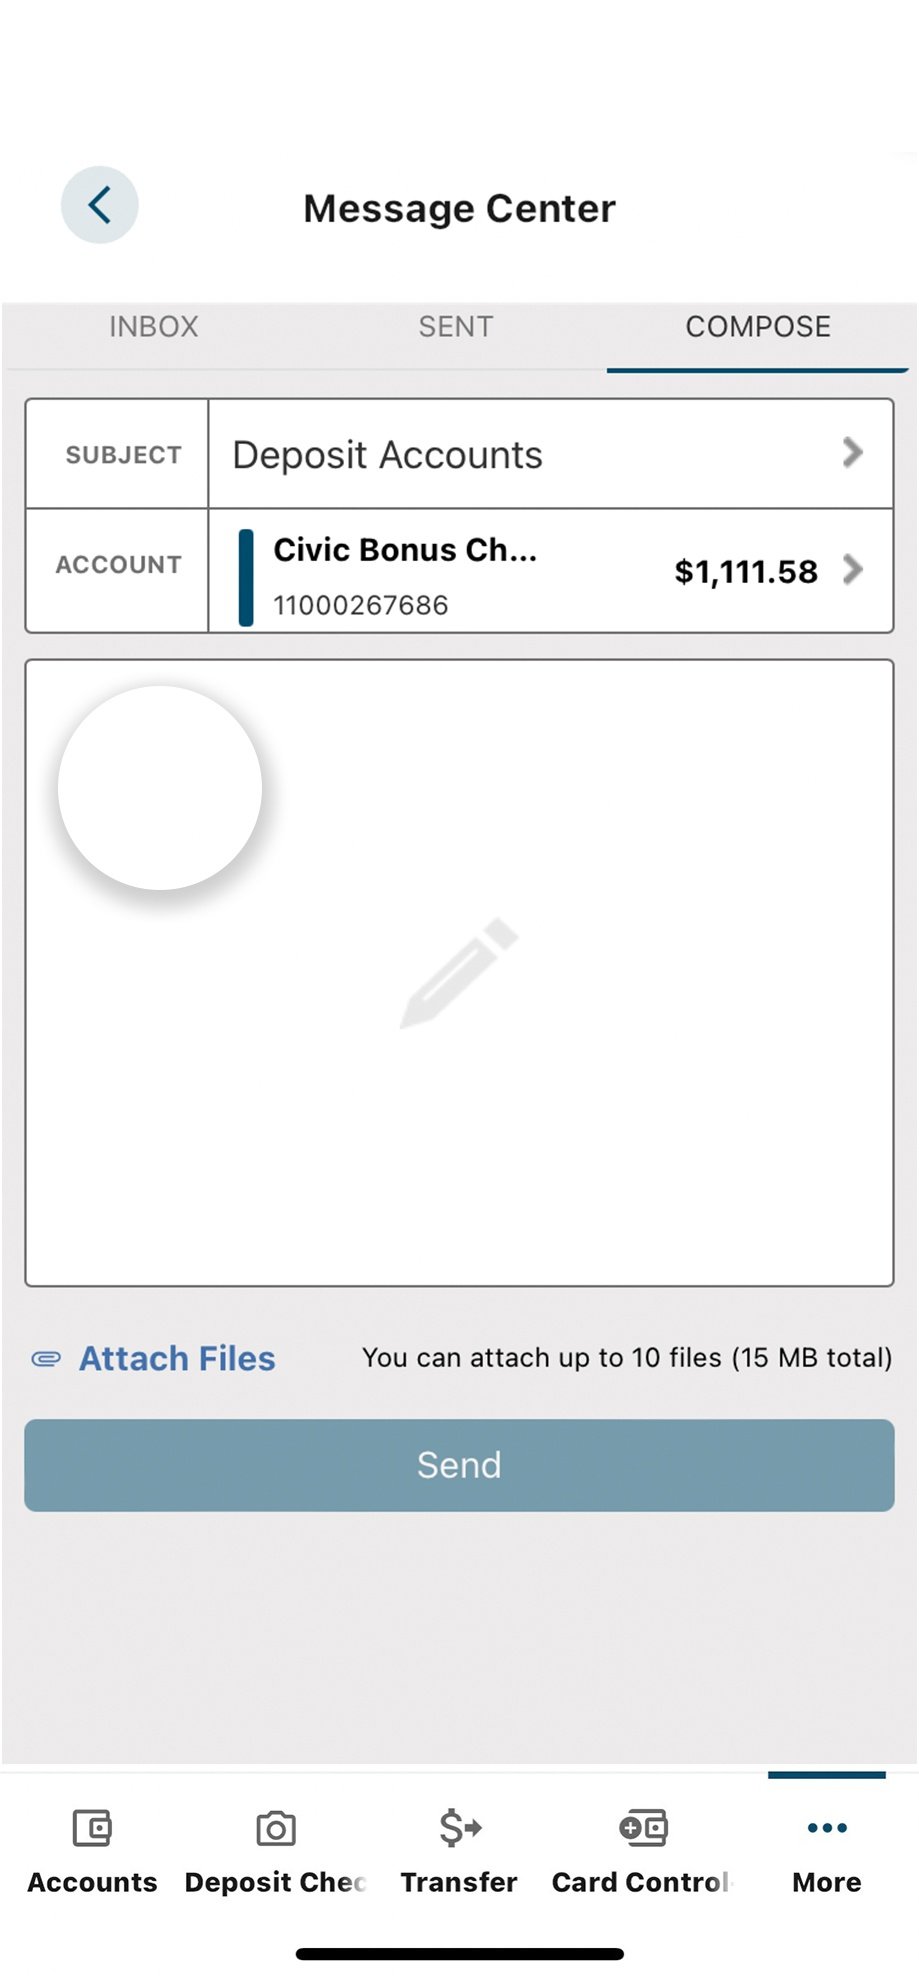
8. Type in the text box
Tap the text box to begin writing a message requesting to add an authorized signer. Include any relevant information so that we can better assist you.
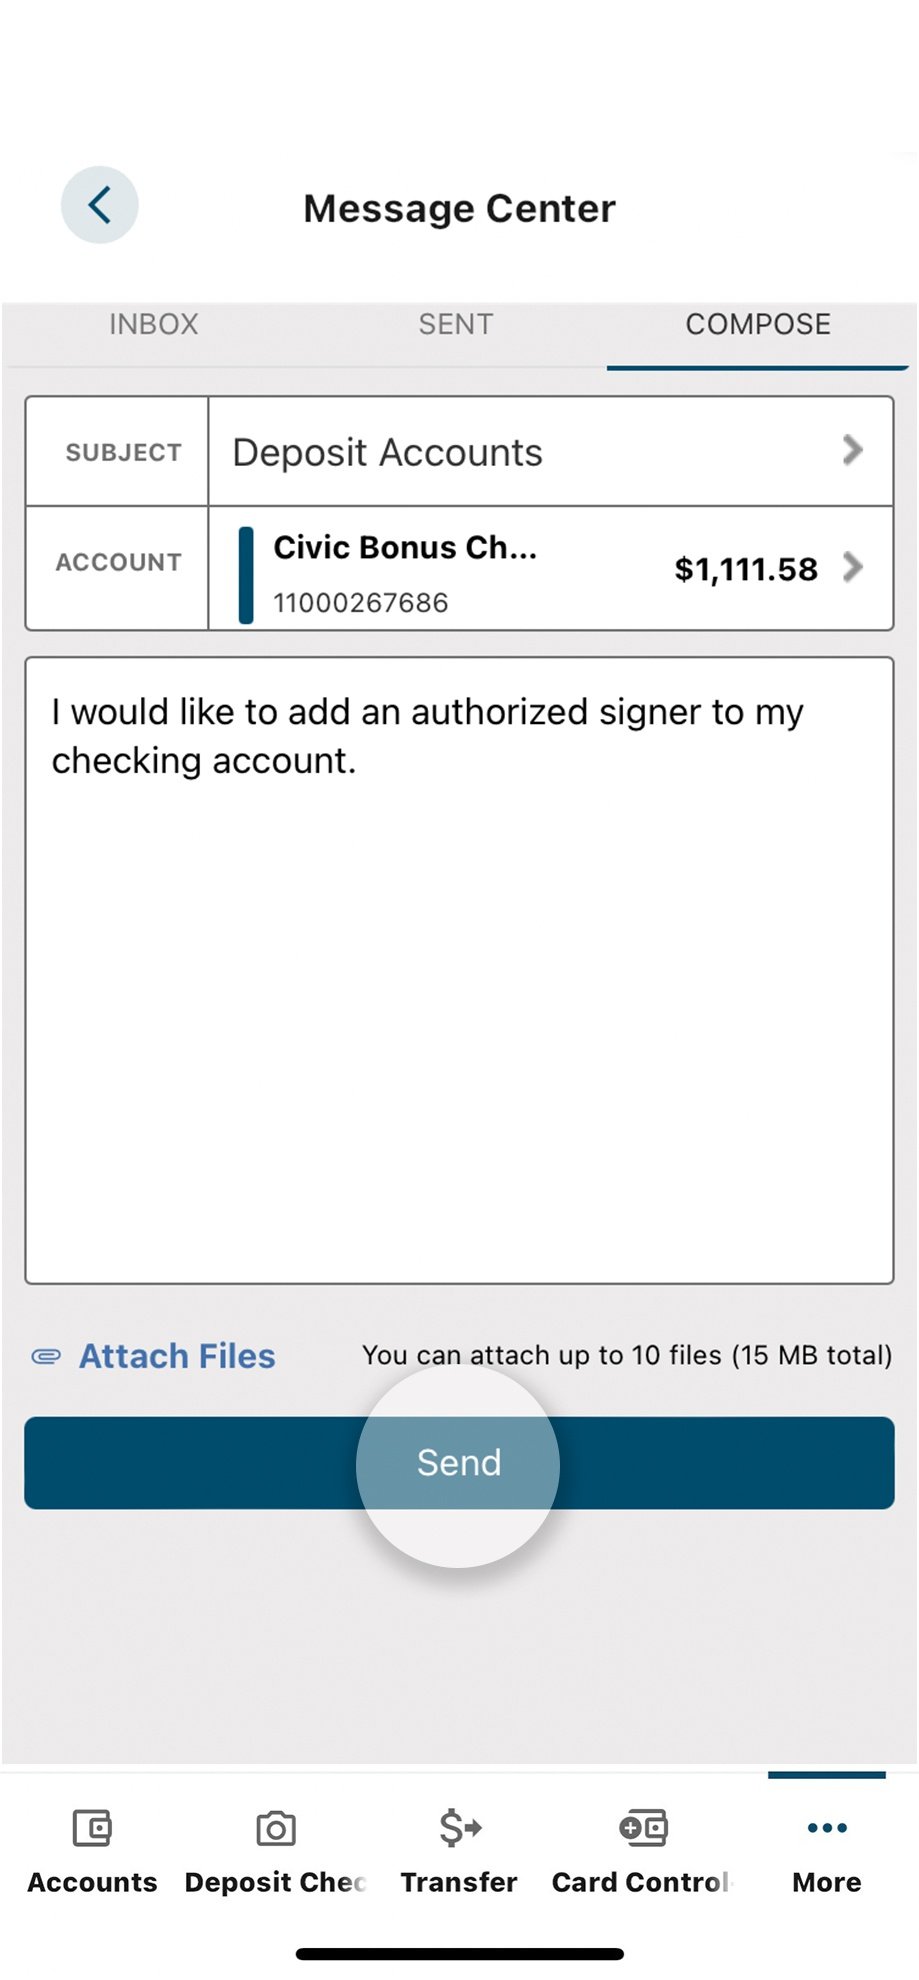
9. Select ‘Send’
After you have written your message, tap the Send button to send your message. A representative will contact you with next steps.
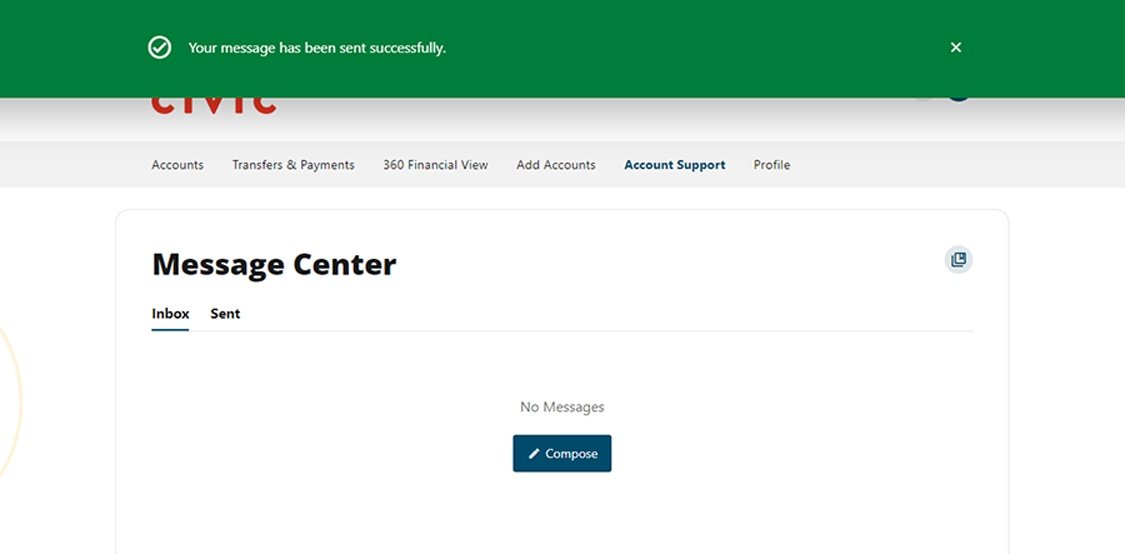
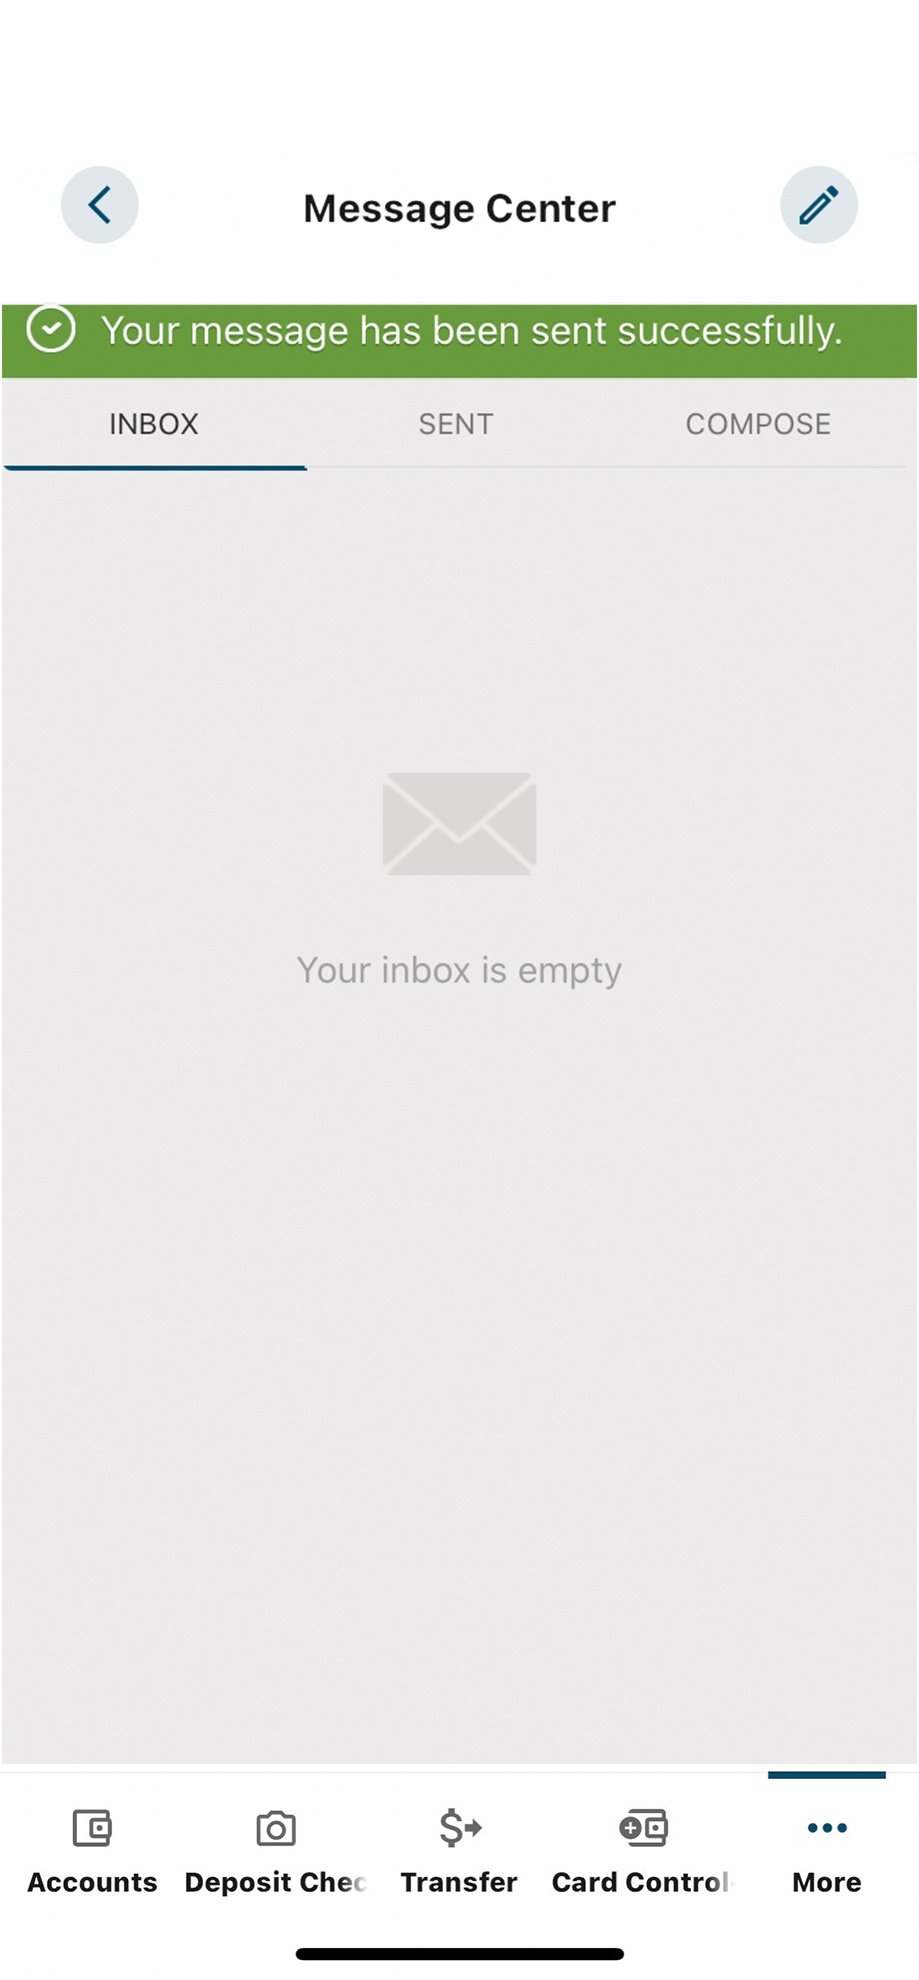
10. View confirmation
You will see a note on your screen indicating your message has been sent.
1. View accounts dashboard
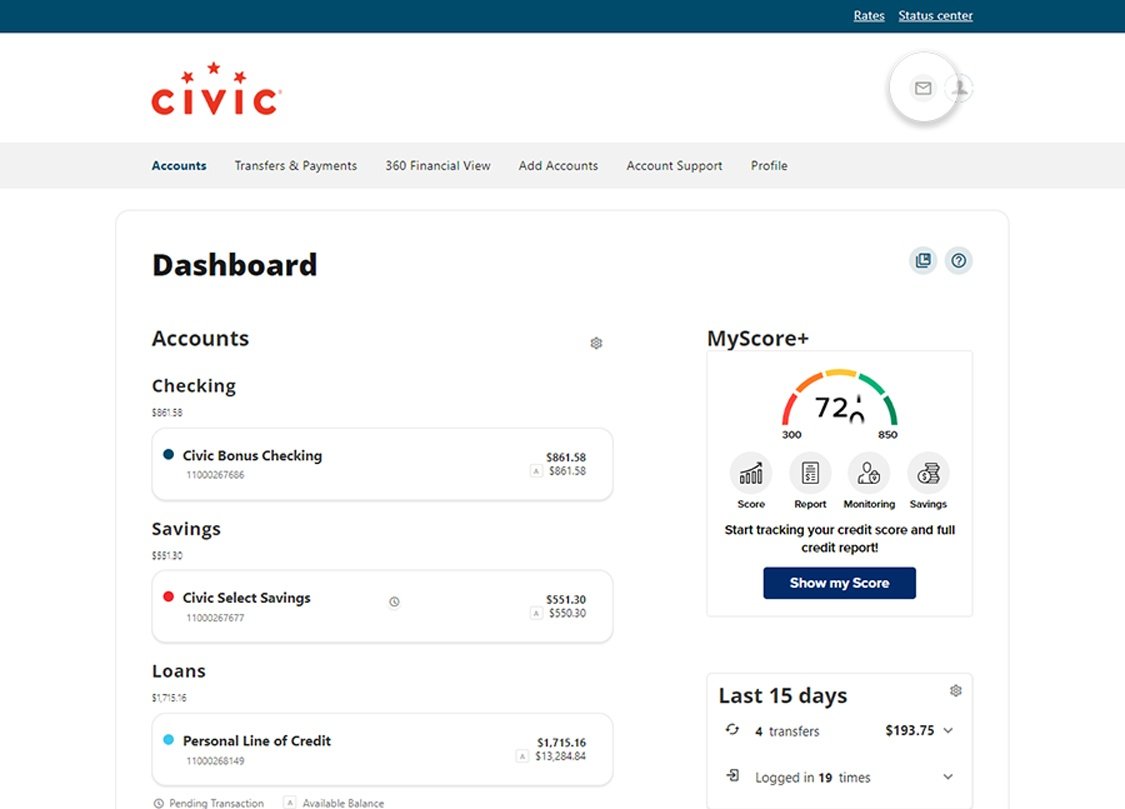
Once you log in, you will see your accounts dashboard. This screen displays all your Civic accounts and cards, and any external accounts you may have set up.
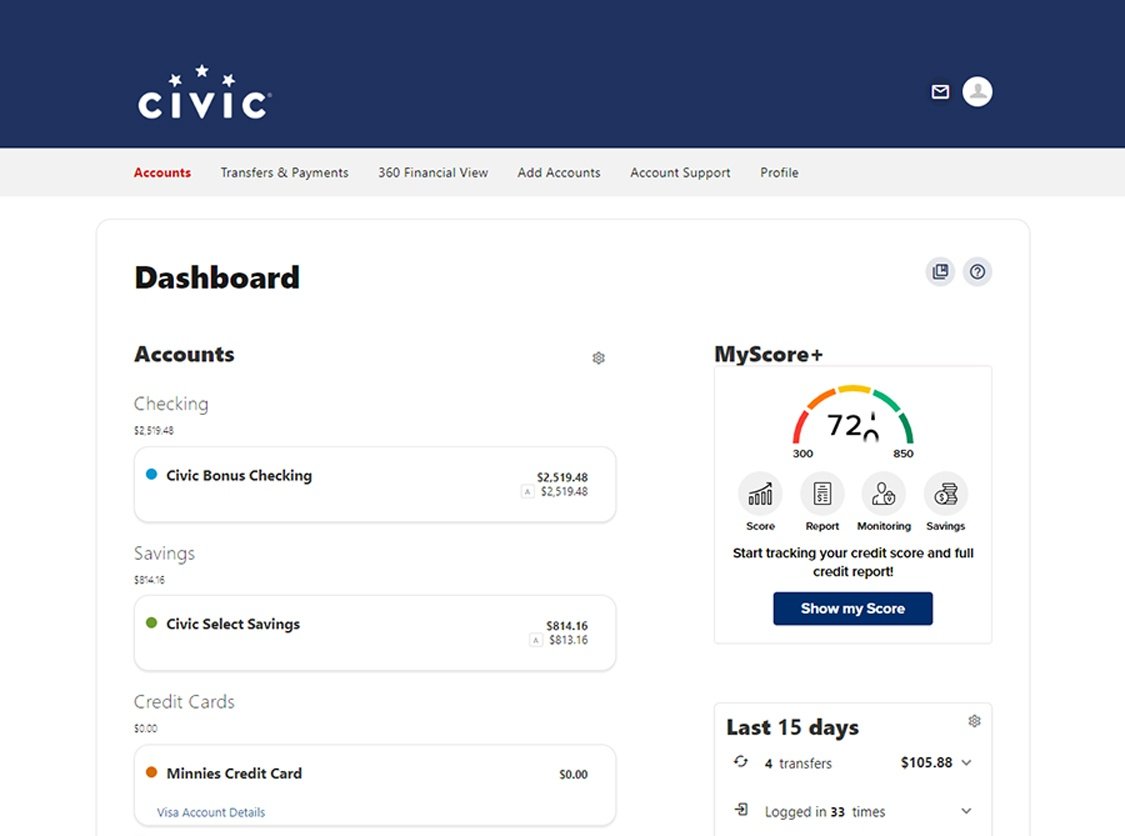
2. Select the envelope icon
In the top right corner of your screen, next to your profile picture, select the envelope icon. This will take you to the Message Center.
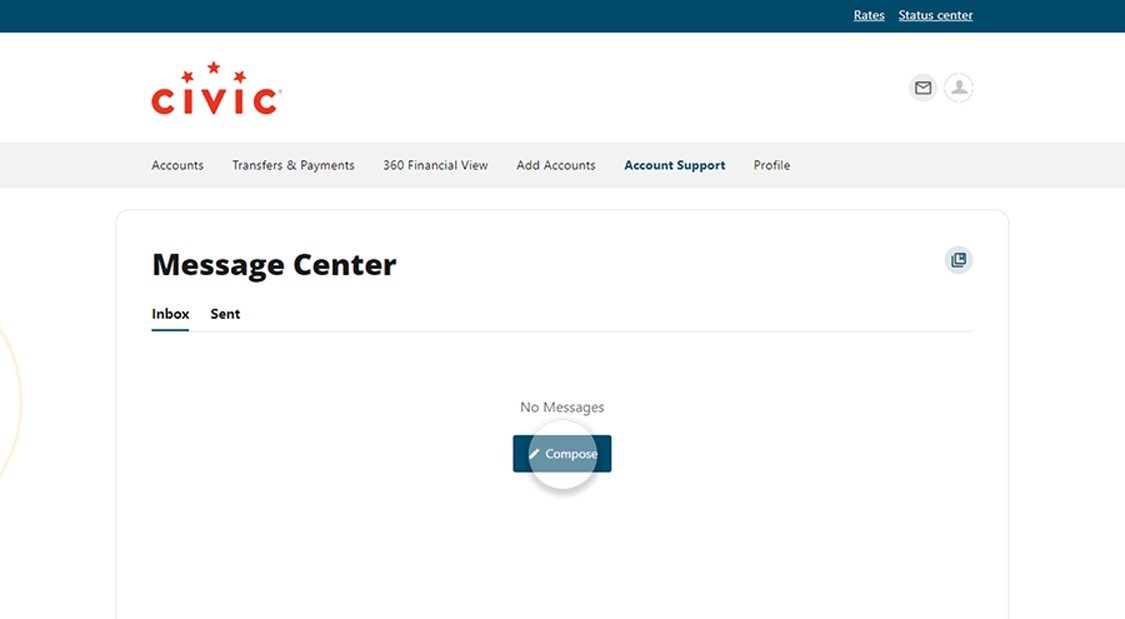
3. Select ‘Compose’
Click the Compose button to start a new message.
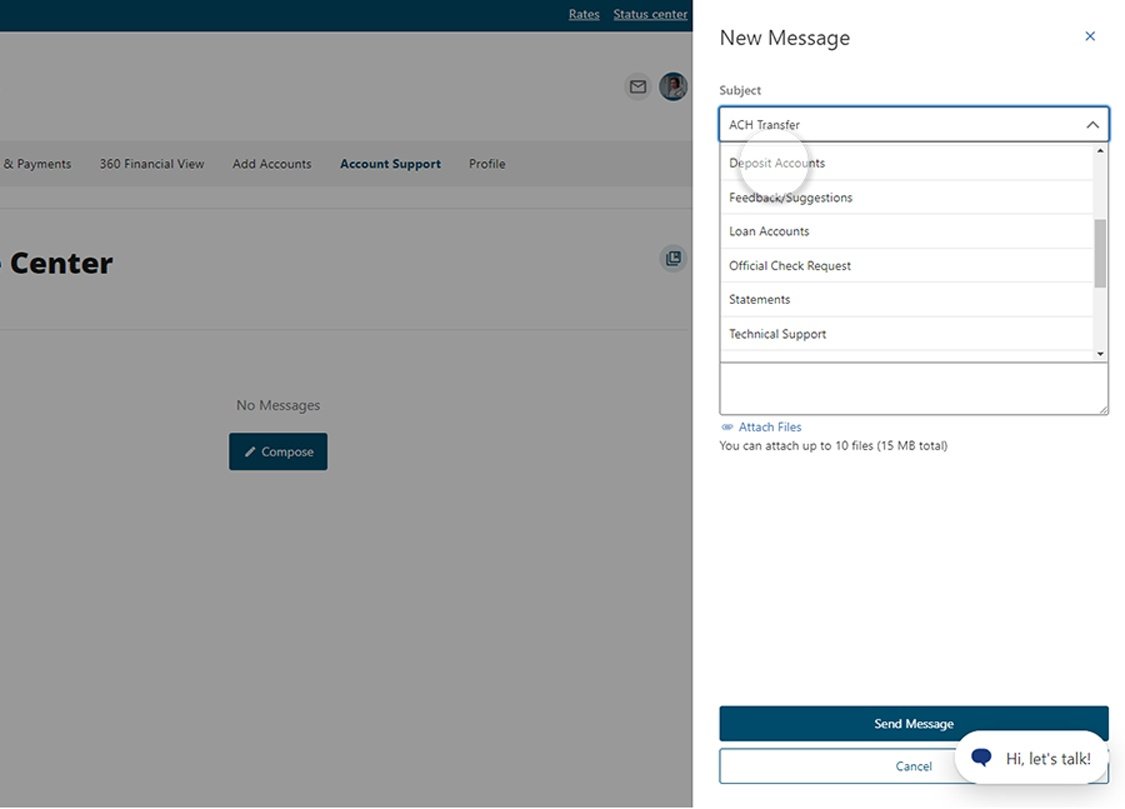
4. Select ‘Subject’
Click the Subject drop-down. Scroll to select ‘Deposit Accounts’
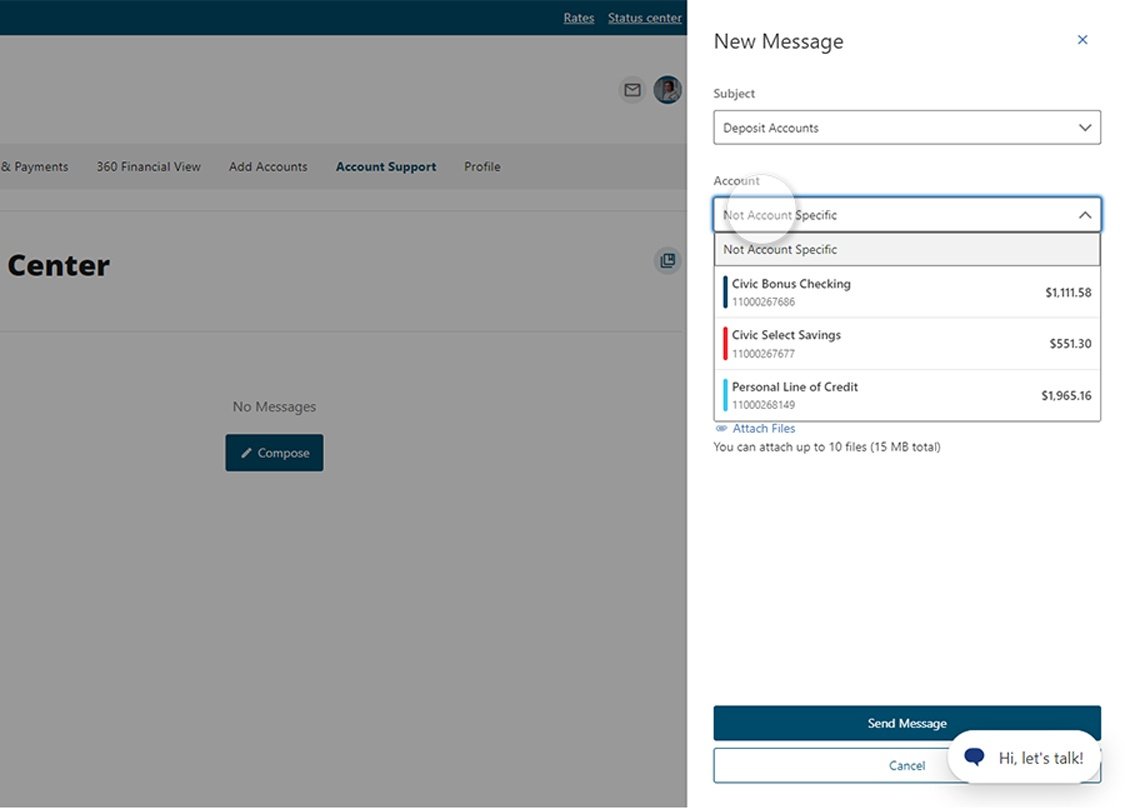
5. Select ‘Account’
Select the Account drop-down and a list of your deposit accounts will appear. Choose the account you want to add an authorized signer to, or choose Not Account Specific.
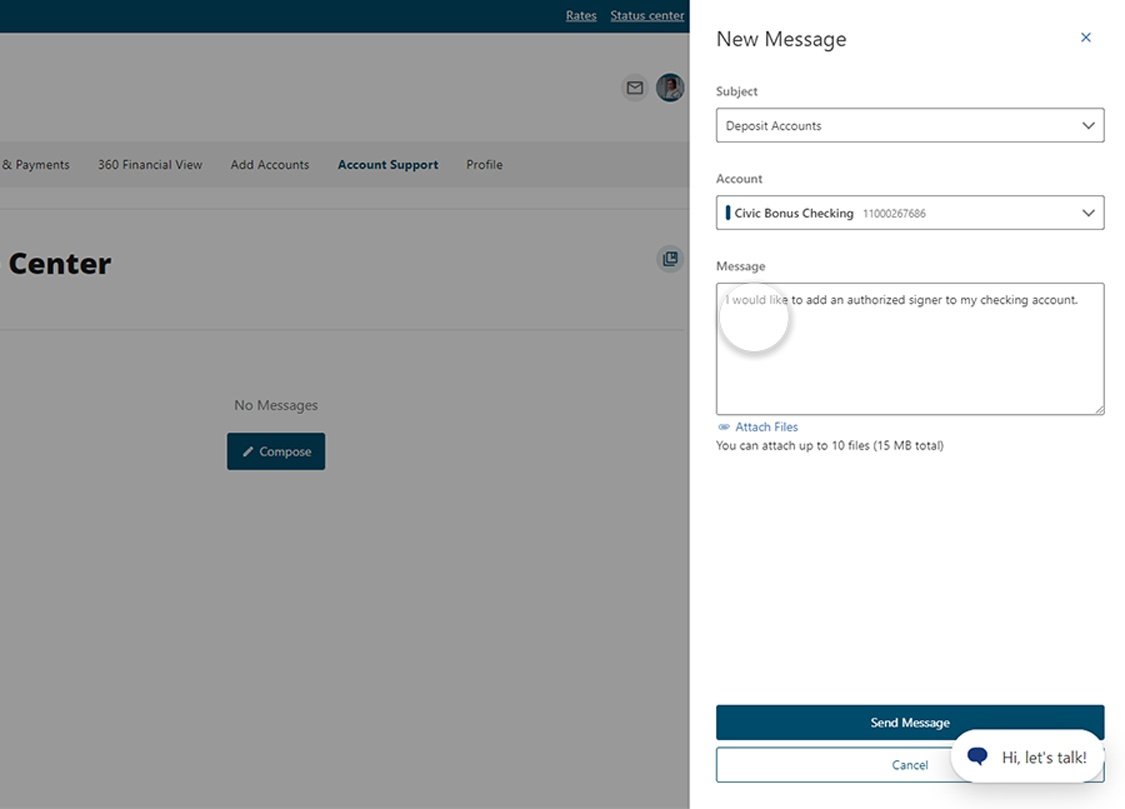
6. Click the message box
Click the message box to begin writing a message requesting to add an authorized signer. Include any relevant information so that we can better assist you.
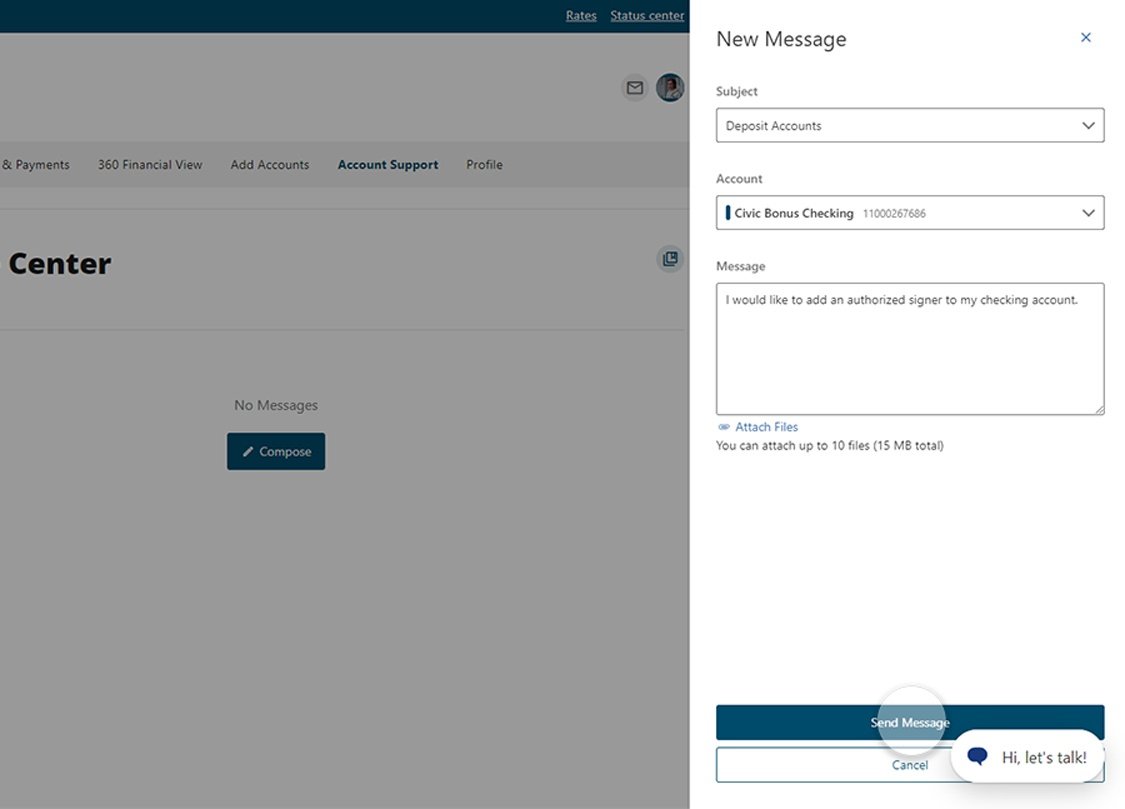
7. Select ‘Send Message’
After you have written your message, tap the Send button to send your message. A representative will be in touch with next steps.
8. View confirmation
Once you have successfully submitted your message, you will see a message bar on your screen confirming your message was sent.
